
How to configure email settings
Customize registration notification templates, subjects, and customer messages.
1. Open Email settings
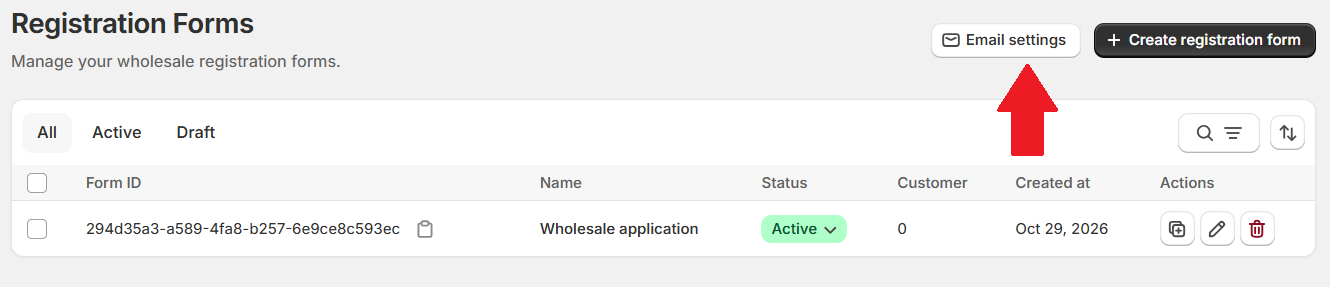
Go to Registration Forms, then click Email settings above the table.
2. Choose a notification
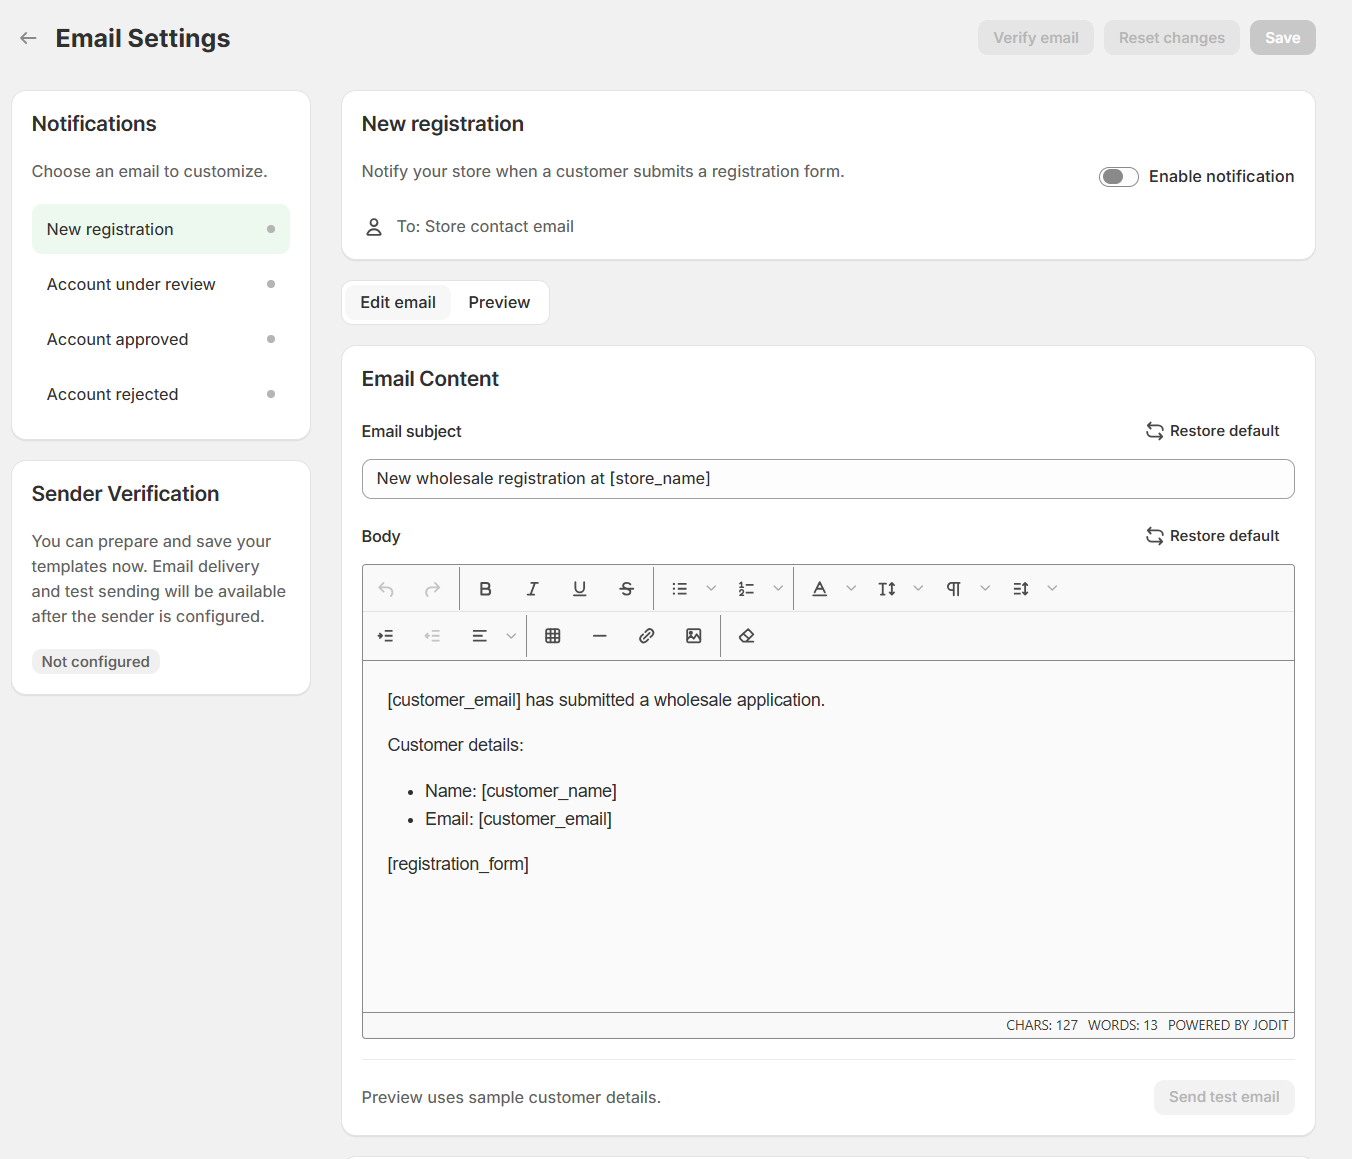
Under Notifications, select New registration, Account under review, Account approved, or Account rejected.
- Enable notification: turn the selected notification on or off.
- To: check the recipient. The example shows New registration, sent to the Store contact email.
3. Edit the email content
In Edit email, customize the Email subject and Body. Use the toolbar to format your message. Restore default returns either field to its default content.
Use email variables
Email variables are placeholders that Lumi automatically replaces with the relevant details for each email. Use them in the subject or body, keeping their spelling and square brackets unchanged.
Preview the email
Open Preview to review the result with sample details.
Choose your sender domain
By default, emails use Lumi’s sender address, no-reply@lumib2b.dev. To send from your own domain, configure and verify it as your custom sender using Verify email.
4. Save your settings
Click Save to keep your changes. Reset changes discards unsaved edits.
Select another notification to customize its content and settings as needed.