
How to create volume discount
Offer quantity or spend discounts, choose eligible buyers and products, and schedule your rule.
1. Create a pricing rule
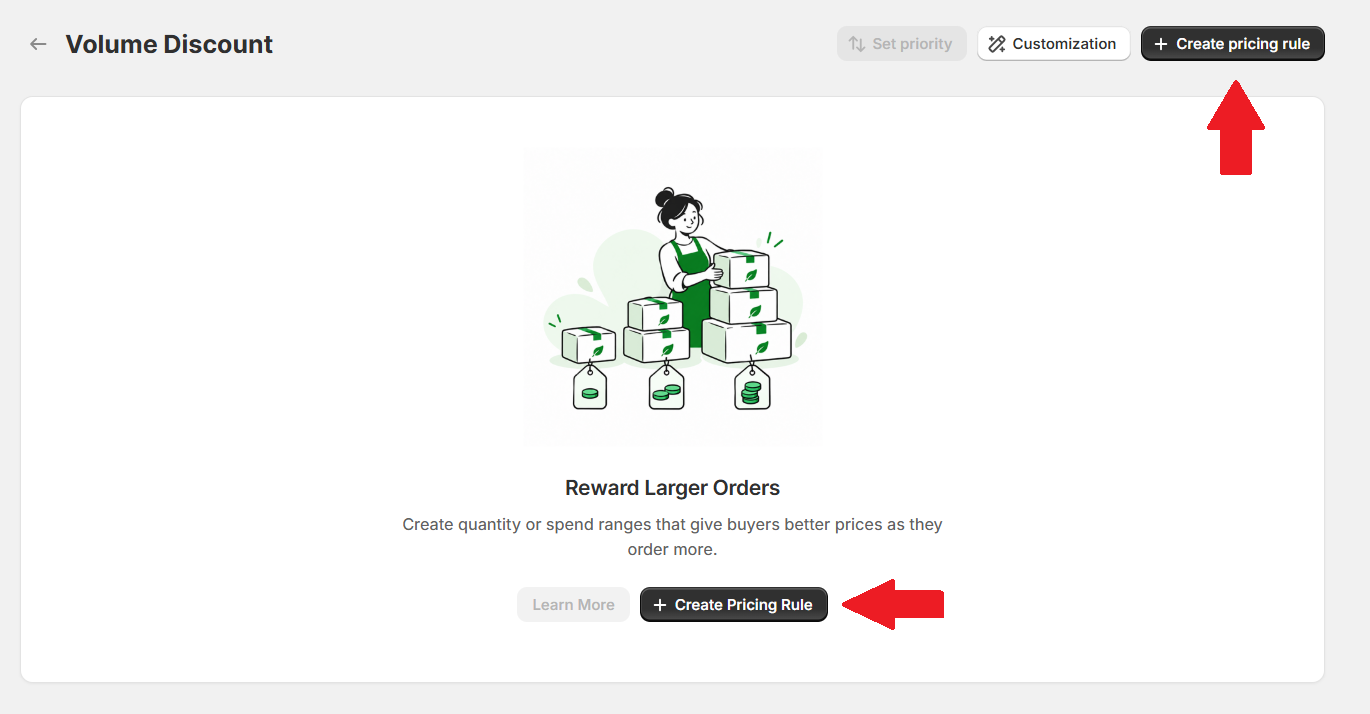
Open Pricing Management Volume Discount in Lumi, then select Create pricing rule. If this is your first rule, you can also use the button in the center of the page.
2. Fill in General Information
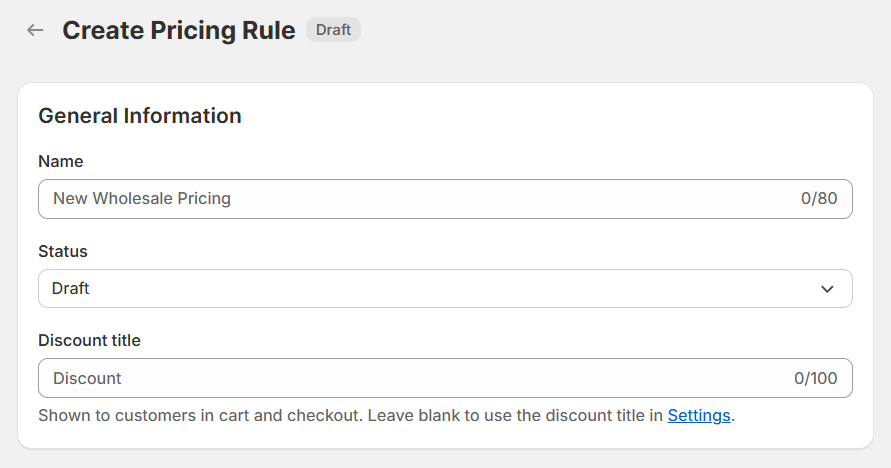
Give the rule a clear name before choosing its audience and prices.
- Name: use something recognizable, such as Buy 10, save 10% or Wholesale volume pricing. This helps you find the rule later.
- Status: choose how the rule is saved:
- Draft: saves the rule without publishing it.
- Active: saves and publishes the rule. Any schedule you set still applies.
- Discount title: enter the label customers will see in cart and checkout. Leave this blank to use the discount title from Settings.
3. Choose eligible customers
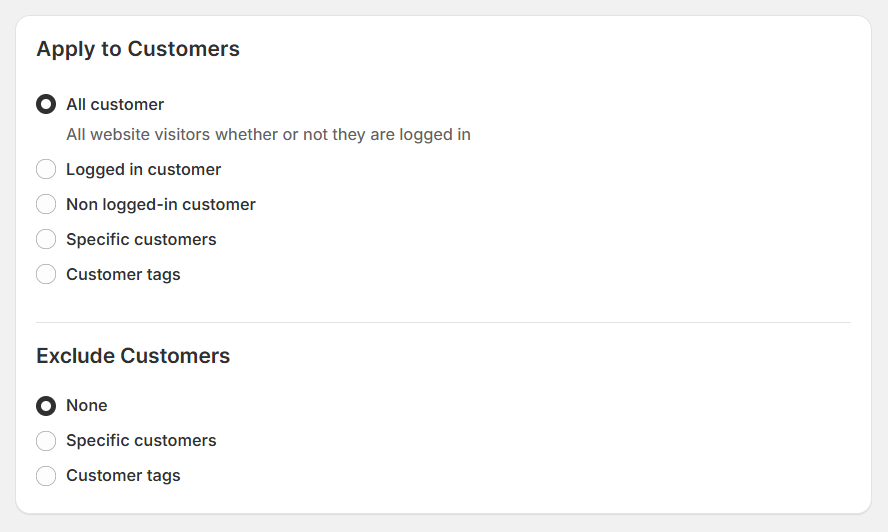
Apply to Customers
Select the audience for this rule:
- All customer: includes visitors whether or not they are signed in.
- Logged in customer: applies to signed-in customers.
- Non logged-in customer: applies to visitors who are not signed in.
- Specific customers: lets you select individual customers.
- Customer tags: lets you select a tagged customer group, such as wholesale buyers.
After choosing Specific customers or Customer tags, select the customers or tags you want to include.
Exclude Customers
Under Exclude Customers, leave None selected if you do not need exceptions. Otherwise, select specific customers or customer tags to exclude. An excluded customer will not receive this rule’s pricing, even if they match the audience above.
4. Choose eligible products
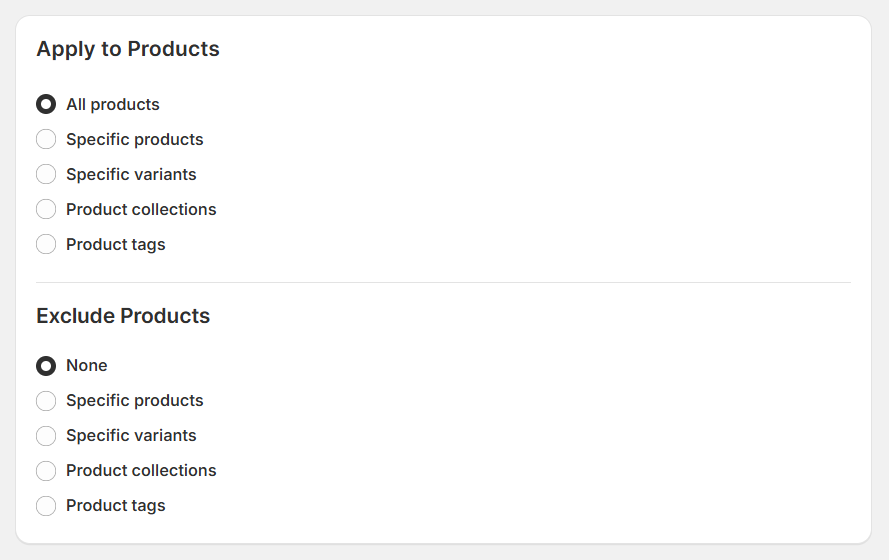
Apply to Products
Choose which items should receive the volume discount:
- All products: includes your entire catalog.
- Specific products: includes selected products.
- Specific variants: includes only the variants you select.
- Product collections: includes products in selected collections.
- Product tags: includes products with selected tags.
For a targeted offer, select the relevant products, variants, collections, or tags after choosing the option.
Exclude Products
Use Exclude Products to leave items out of a broader selection. For example, you can include a collection but exclude a product that already has a special offer. Choose None if every selected item should qualify.
5. Choose eligible markets
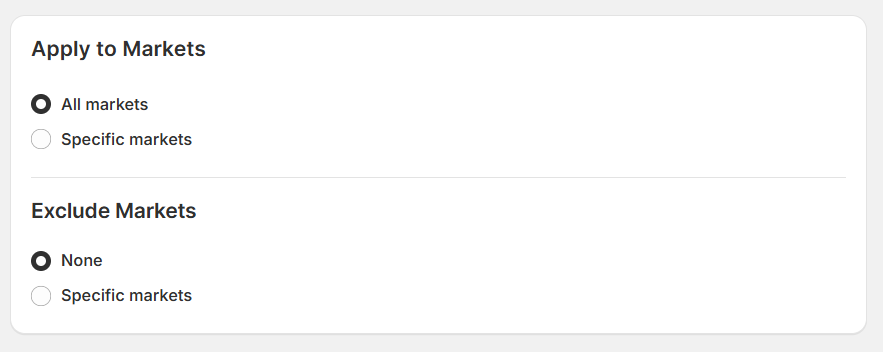
Apply to Markets
Select All markets to make the rule available across your markets, or choose Specific markets and select where it should apply.
Exclude Markets
Keep None or select the markets you want to leave out. Make sure the intended customer’s market is included and not excluded.
6. Set up your discount ranges
Discount Settings
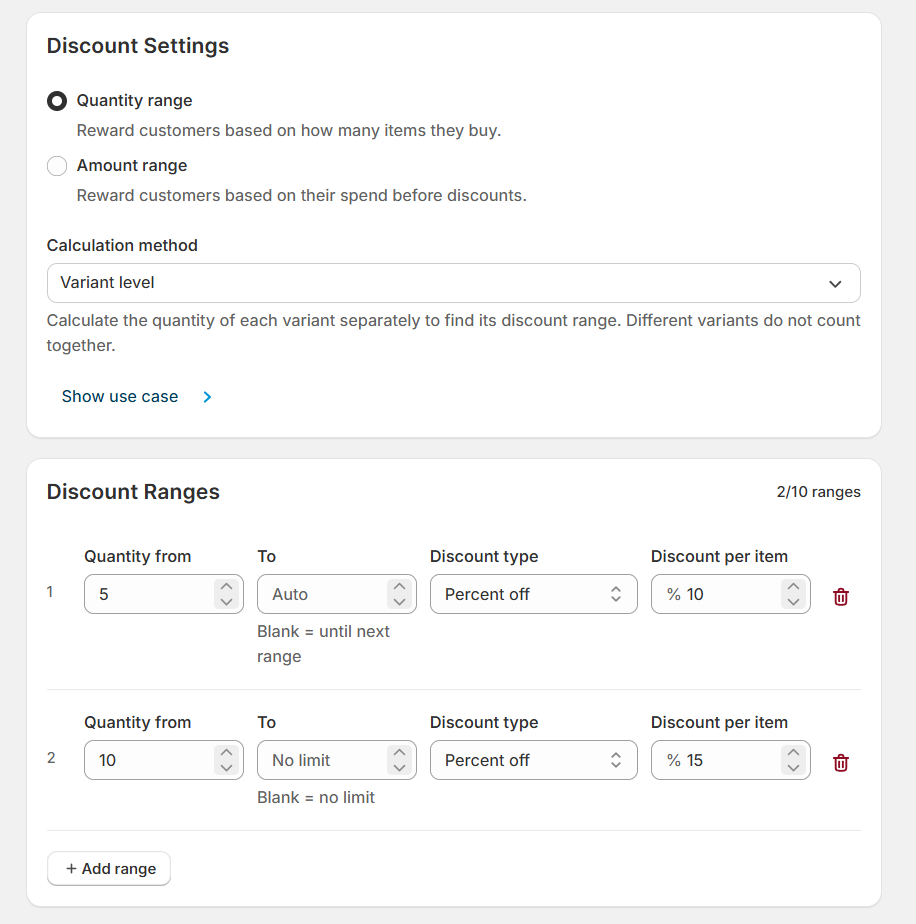
Choose what customers need to purchase to qualify:
- Quantity range: uses the number of items purchased.
- Amount range: uses the amount spent before discounts.
Next, choose a Calculation method:
- Variant level: counts each variant separately. Different variants do not count together.
- Product level: counts items at product level.
- All selected items combined: combines the items selected for the rule.
- Entire order: uses the entire order for the range calculation.
The example uses Quantity range Variant level, so a customer must buy the required quantity of the same variant. Open Show use case for an explanation of the selected method.
Discount Ranges
Add a row for each discount tier:
- Enter the minimum quantity in Quantity from, or the minimum spend for an amount-based rule.
- Enter the upper limit in To, or leave it blank. When another range follows, Auto ends this tier where the next one begins. For the last range, a blank value means No limit.
- Choose a Discount type: Percent off, Amount off, or New price.
- Enter Discount per item: a percentage, an amount to subtract, or the final unit price.
- Select Add range for another tier. You can add up to 10 ranges and remove a row with its trash icon.
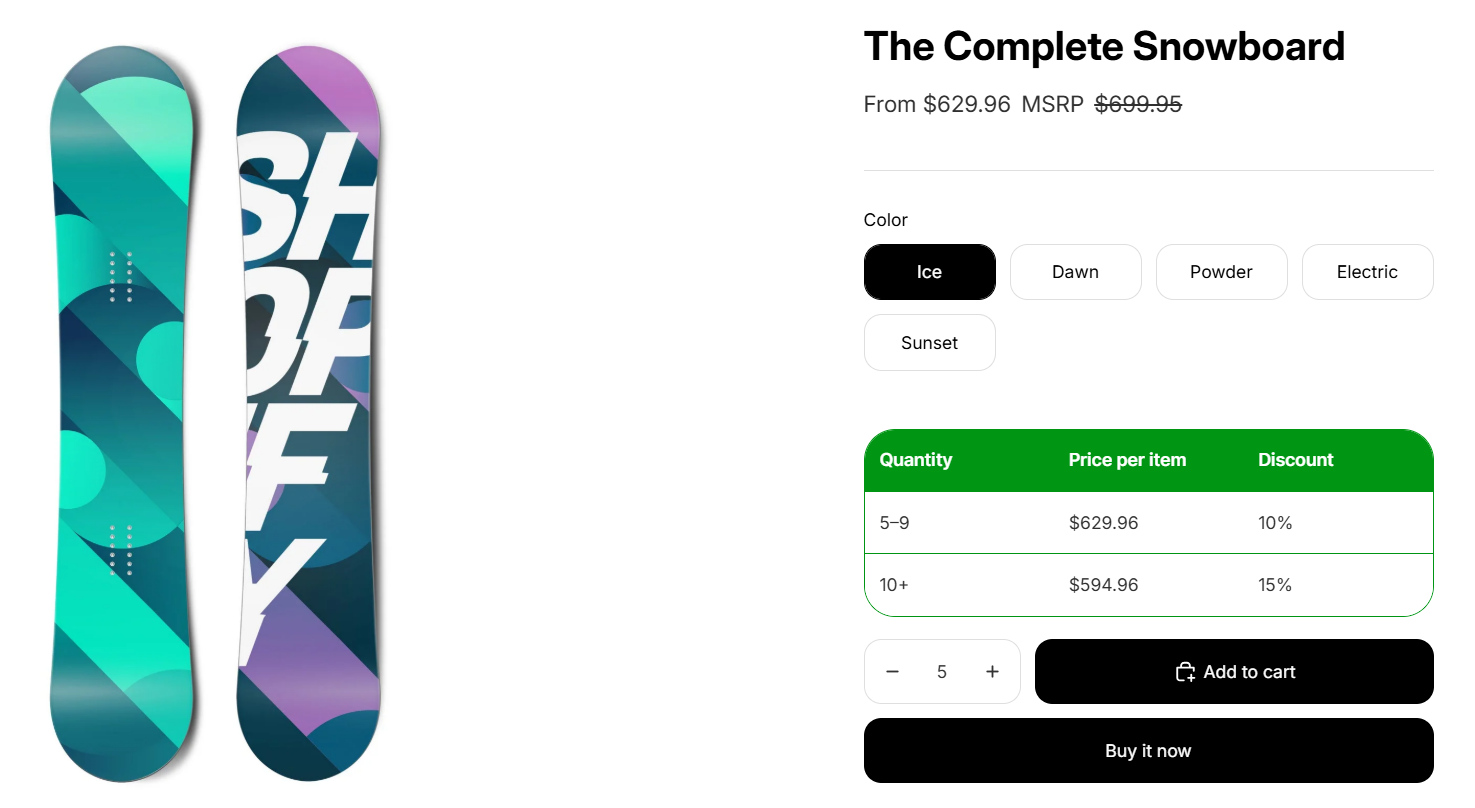
The example shows two quantity tiers for the same variant:
- 5–9 items: enter 5 in Quantity from, leave To blank (Auto), select Percent off, and enter 10 in Discount per item. The next range starts at 10, so this tier ends at 9.
- 10 or more items: add a second range starting at 10, leave To blank (No limit), select Percent off, and enter 15 in Discount per item.
This gives customers 10% off for 5–9 items and 15% off for 10 or more, without overlapping ranges.
7. Choose when the rule applies
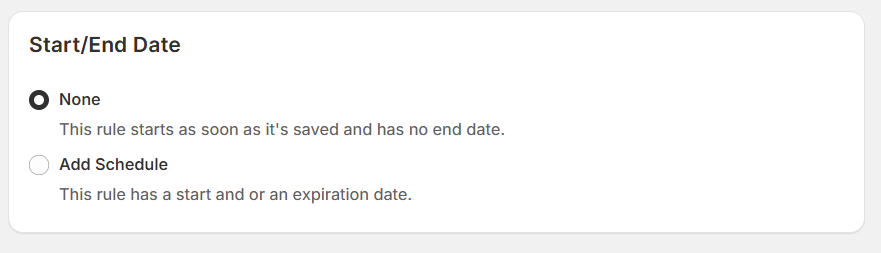
Start without a schedule
Select None under Start/End Date for a rule that has no scheduled end. It can apply as soon as it is saved as Active. A Draft rule does not apply to customers.
Set a start or end date
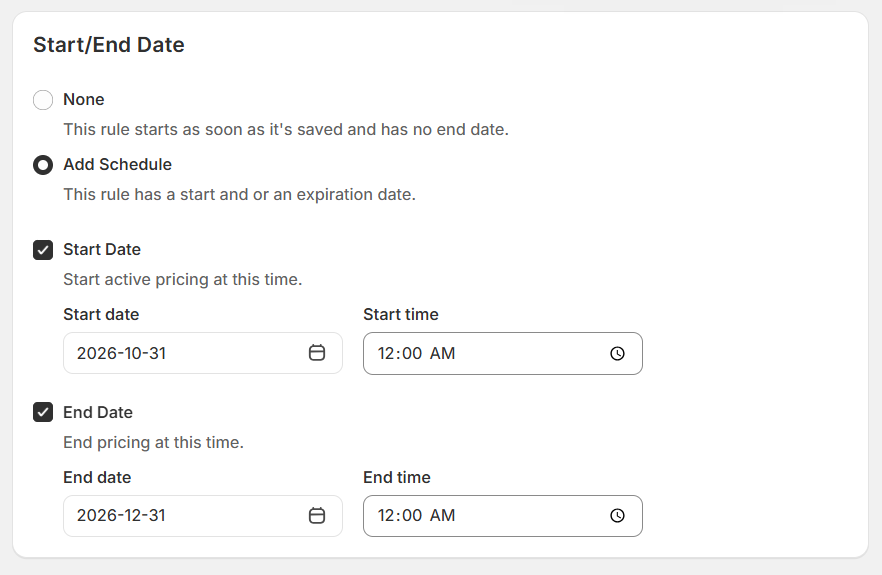
Select Add Schedule, then enable the dates you need:
- Check Start Date to choose when the pricing begins. Enter the start date and time.
- Check End Date to choose when it stops. Enter the end date and time.
- If you use both, make sure the end is later than the start.
You can use only a start date, only an end date, or both. Follow the store timezone shown by the app. In this example, the rule starts on October 31, 2026 at 12:00 AM and ends on December 31, 2026 at 12:00 AM—the beginning of that day.
8. Save your rule
Click Save. Draft saves without publishing; Active saves and publishes the rule according to your schedule.
Here is an example of volume discount pricing on a product page, showing 10% off for 5–9 items and 15% off for 10 or more:
If multiple rules match, set their priority. To style the prices and discount table, follow How to customize volume discount.