
How to create registration form
Create a wholesale registration form, set customer approval, and customize its appearance.
1. Create a form
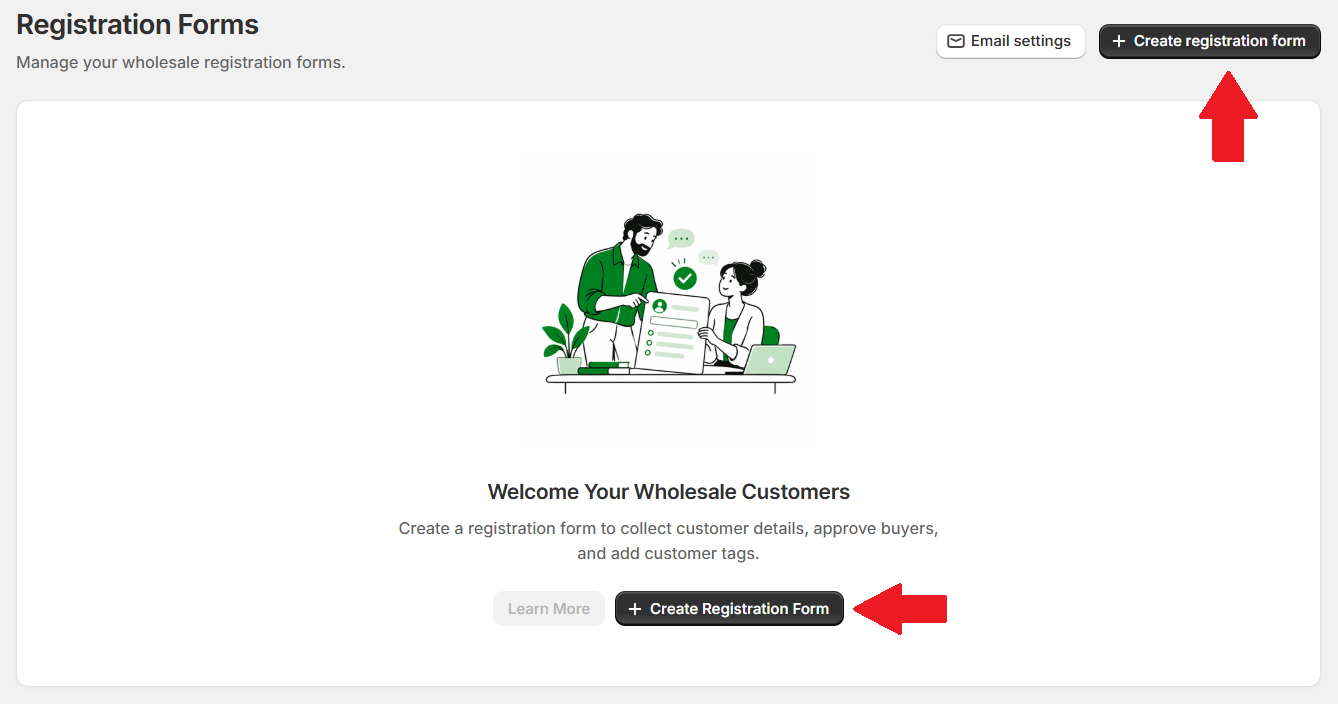
In Lumi, open Registration Forms and click Create registration form. If this is your first form, you can also use the create button in the welcome panel.
2. Enter the general information
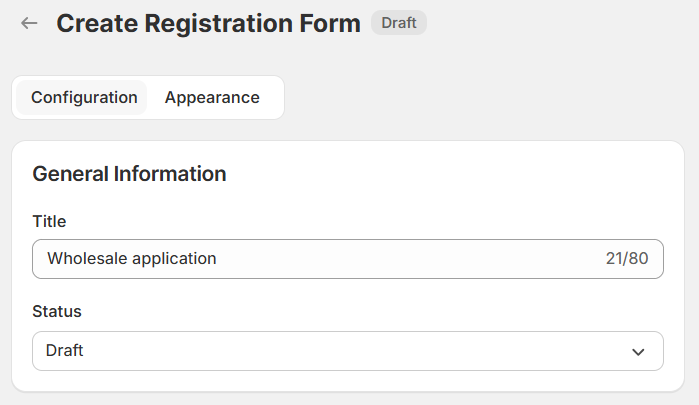
Under Configuration General Information, enter a Title to identify the form. The example uses Wholesale application.
Choose a Status:
- Draft: saves the form without publishing it.
- Active: saves and publishes the form. Add it to your storefront using the steps in the next tutorial.
3. Choose how customers are approved
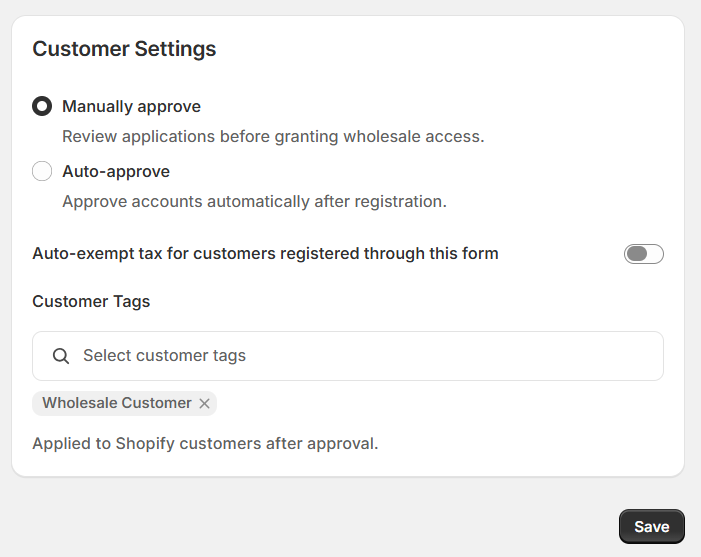
Under Customer Settings, choose:
- Manually approve: review each application before approving the customer.
- Auto-approve: approve customers automatically after registration.
Tax exemption
Enable Auto-exempt tax for customers registered through this form if these customers should be tax-exempt.
Customer Tags
Select the tags to apply to Shopify customers after approval. The example uses Wholesale Customer. You can target this tag in your wholesale pricing rules.
4. Customize the header
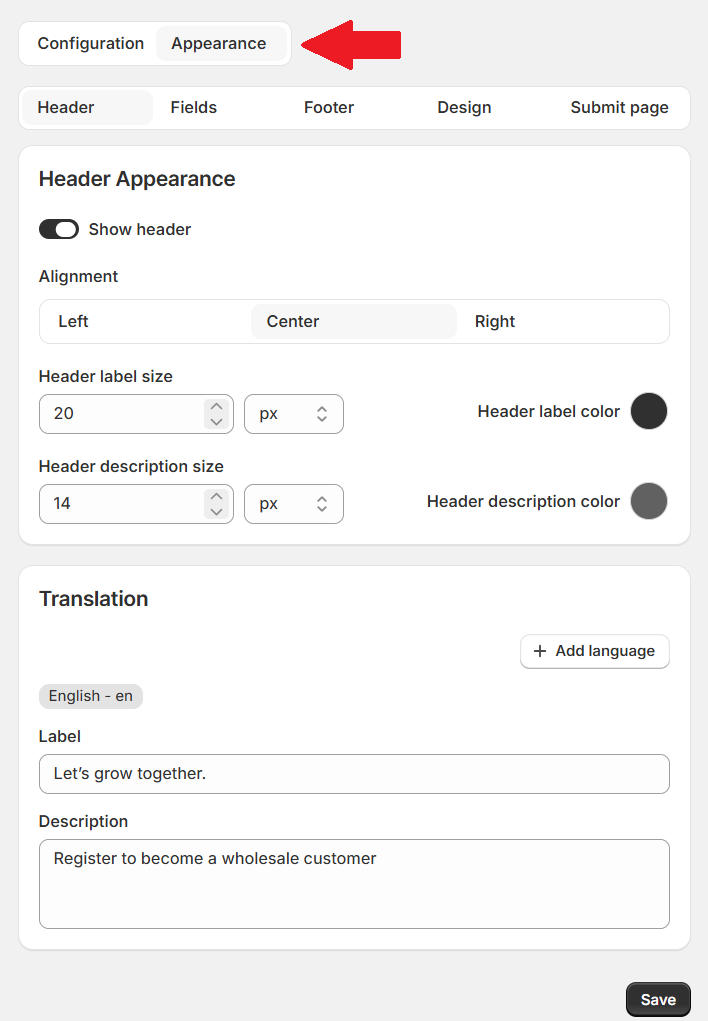
Open Appearance Header.
- Use Show header to show or hide the introduction, then adjust its alignment, text sizes, and colors.
- Under Translation, enter the heading in Label and the introduction in Description. Use Add language for translations.
5. Add and arrange fields
Open Appearance Fields to choose the information customers provide. The example includes first name, last name, email, and company name.
- Use the up and down arrows to reorder fields.
- Select the pencil icon to edit a field.
- Use the duplicate icon to copy a field or the trash icon to remove it.
- Keep the Email field so applications include a customer email address; its delete control is disabled.
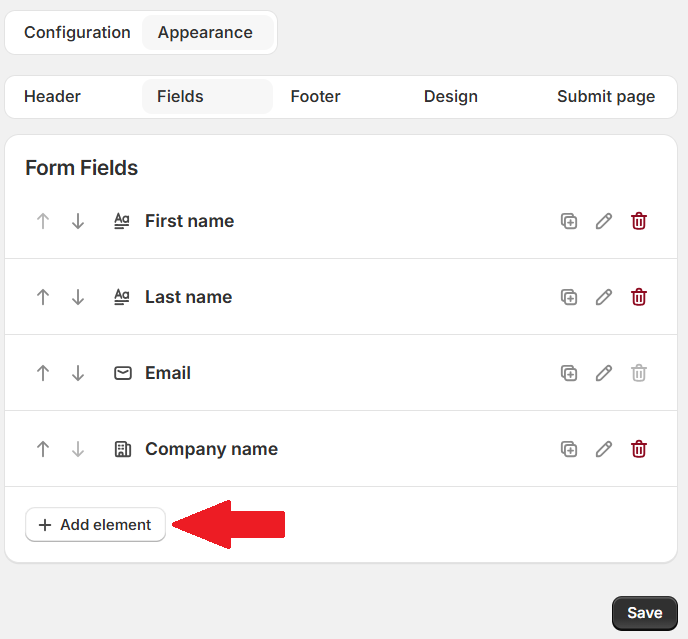
Click Add element and choose the field you need, such as a text field, dropdown, checkbox, or address field.
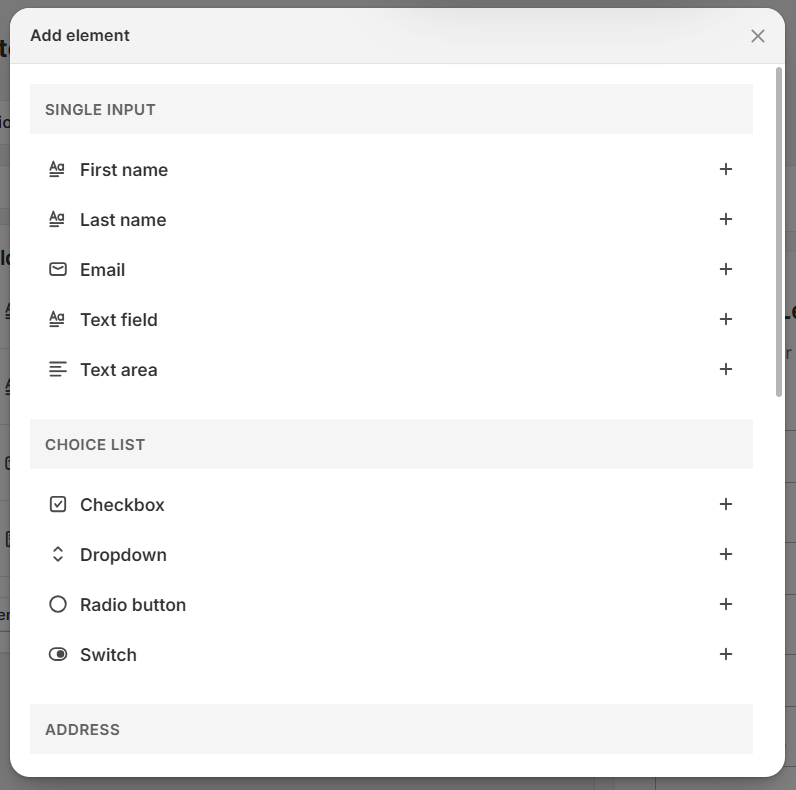
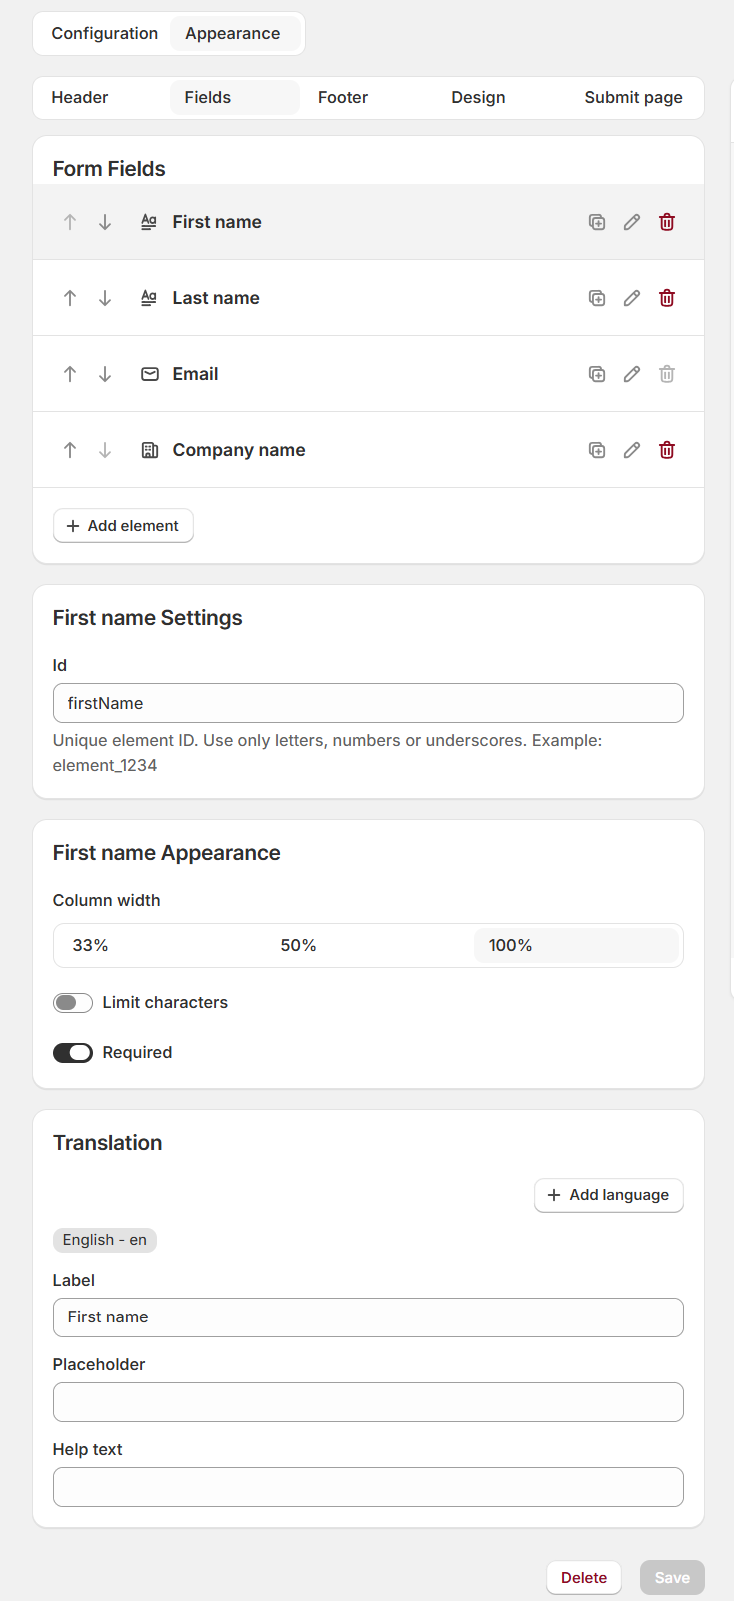
6. Edit a field
Select a field’s pencil icon to edit it.
- Column width: choose 33%, 50%, or 100% to control how much of the row the field occupies.
- Required: require customers to complete the field before submitting.
- Translation: customize the field’s text and use Add language to provide translations. The available text options depend on the field type.
Other settings vary by field type. Adjust the options you need, then click Save.
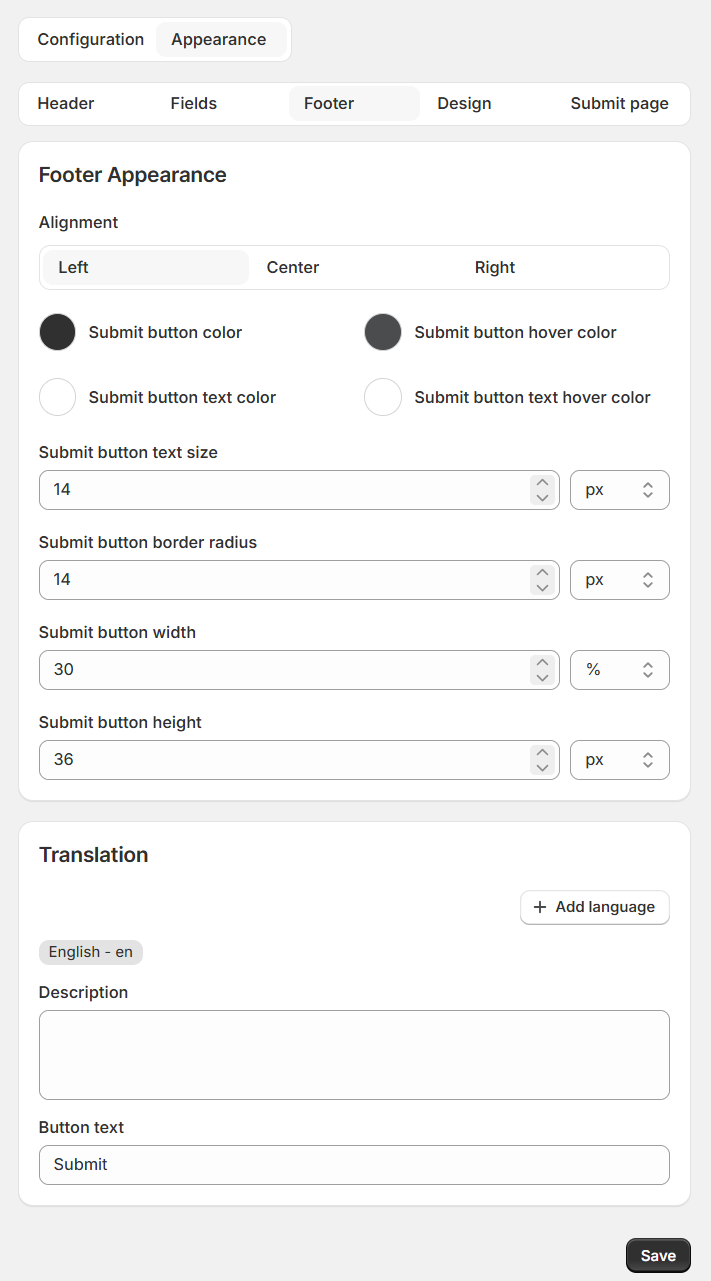
7. Style the footer
Open Appearance Footer to style the submit button.
- Adjust the button’s alignment, colors, text size, rounded corners, and dimensions.
- Under Translation, enter the button text and an optional footer description. Use Add language for translations.
8. Set the overall design
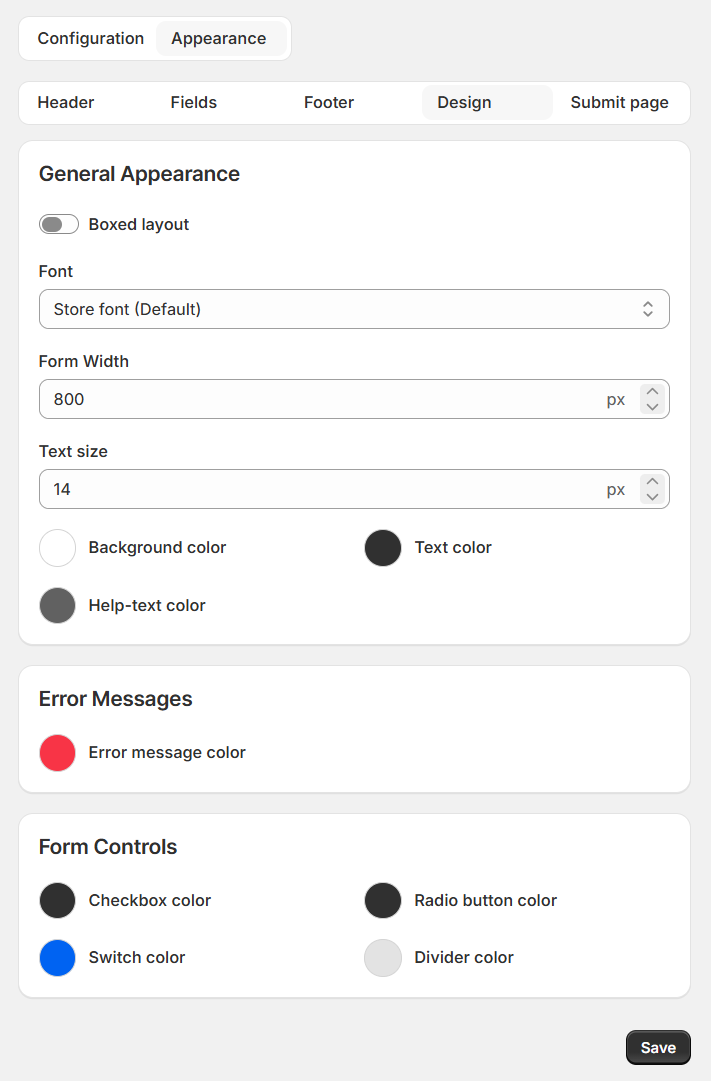
Open Appearance Design to style the whole form.
- Under General Appearance, choose the font, form width, text size, and colors. Enable Boxed layout if you want a container around the form.
- Use Error Messages and Form Controls to adjust the colors of validation messages and form controls.
9. Write the success message
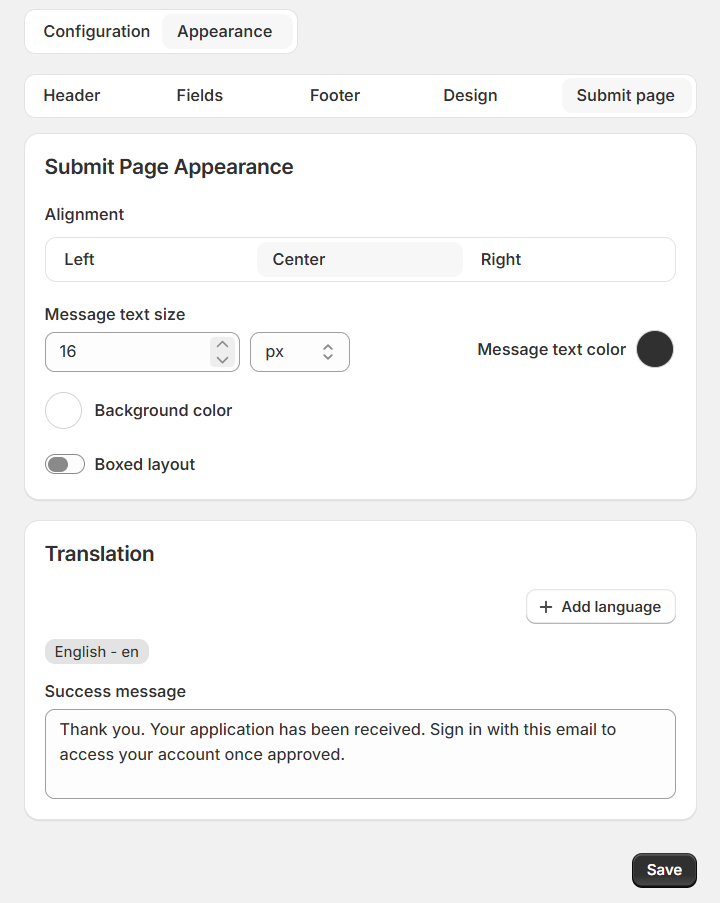
Open Submit page to style the screen shown after a successful submission. Set its alignment, text size, text and background colors, and optional boxed layout. Enter the Success message in Translation.
For manual approval, explain that the application will be reviewed rather than promising immediate wholesale access.
10. Save the form
Click Save to keep your changes. When ready to accept applications, select Active under Configuration General Information and save.
Next, add the form to your storefront or configure registration email templates.